Mybatis快速上手教程
Contents
一 准备工作
1新建maven工程
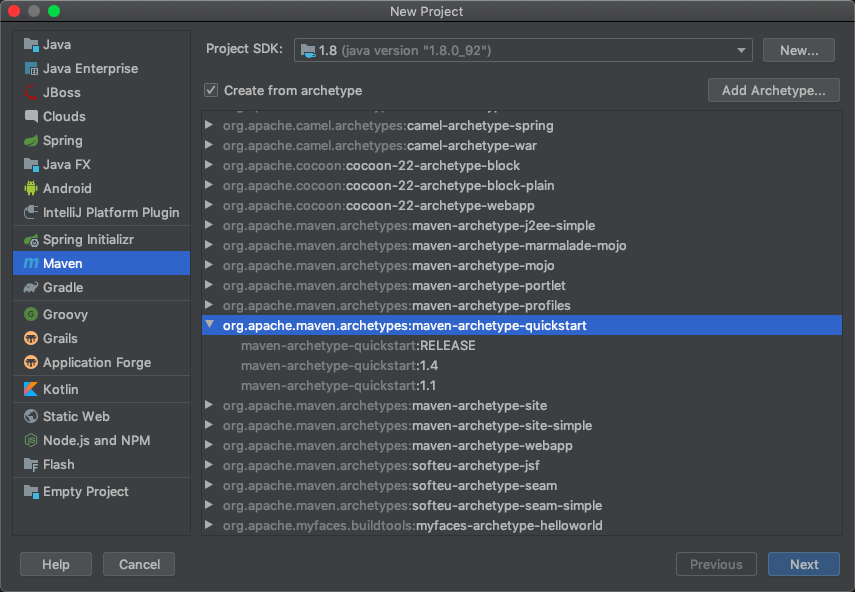
项目名称:mybatis-project,GroupId:com.knockatdatabase;ArtifiactId:mybatis-project;Version:1.0-SNAPSHOT
2导入依赖
分别导入mybatis、MySQL,log4j,Junit的相关依赖。
在项目的pom.xml文件中,添加对应的依赖和版本号。如果不清楚的话,可以到maven的中央仓库「https://mvnrepository.com/」去搜索,然后把对应的GAV填入到配置文件中去。
 <dependencies>
    <dependency>
      <groupId>org.mybatis</groupId>
      <artifactId>mybatis</artifactId>
      <version>3.5.6</version>
    </dependency>
    <dependency>
      <groupId>mysql</groupId>
      <artifactId>mysql-connector-java</artifactId>
      <version>8.0.25</version>
    </dependency>
    <dependency>
      <groupId>log4j</groupId>
      <artifactId>log4j</artifactId>
      <version>1.2.17</version>
    </dependency>
    <dependency>
      <groupId>junit</groupId>
      <artifactId>junit</artifactId>
      <version>4.13.2</version>
    </dependency>
  </dependencies>
3创建MySQL数据库和表
登录到数据库服务器,并创建响应的库和用户:
创建数据库、用户、授权:
[mysql@ppasdev ~]$ mysql -h localhost -uroot -p Enter password: Welcome to the MySQL monitor. Commands end with ; or \g. Your MySQL connection id is 2563 Server version: 5.6.32-log MySQL Community Server (GPL) mysql> create database mybatis_project character set utf8 collate utf8_bin; Query OK, 1 row affected (2.08 sec) mysql> create user 'mybatis_project'@'%' identified by 'mybatis_project'; Query OK, 0 rows affected (0.21 sec) mysql> grant all privileges on mybatis_project.* to 'mybatis_project'@'%' with grant option; Query OK, 0 rows affected (0.02 sec) mysql> flush privileges; Query OK, 0 rows affected (0.07 sec) mysql>
建表:
[mysql@ppasdev ~]$ mysql -h localhost -umybatis_project -p Enter password: Welcome to the MySQL monitor. Commands end with ; or \g. Your MySQL connection id is 2564 Server version: 5.6.32-log MySQL Community Server (GPL) Copyright (c) 2000, 2016, Oracle and/or its affiliates. All rights reserved. Oracle is a registered trademark of Oracle Corporation and/or its affiliates. Other names may be trademarks of their respective owners. Type 'help;' or '\h' for help. Type '\c' to clear the current input statement. mysql> use mybatis_project; Database changed mysql> create table tbl_employee(id int(11) primary key auto_increment,last_name varchar(50),gender char(1),email varchar(30)); Query OK, 0 rows affected (1.37 sec) mysql> show tables; +---------------------------+ | Tables_in_mybatis_project | +---------------------------+ | tbl_employee | +---------------------------+ 1 row in set (0.00 sec) mysql> desc tbl_employee; +-----------+-------------+------+-----+---------+----------------+ | Field | Type | Null | Key | Default | Extra | +-----------+-------------+------+-----+---------+----------------+ | id | int(11) | NO | PRI | NULL | auto_increment | | last_name | varchar(50) | YES | | NULL | | | gender | char(1) | YES | | NULL | | | email | varchar(30) | YES | | NULL | | +-----------+-------------+------+-----+---------+----------------+ 4 rows in set (0.47 sec) mysql>
4 新建Java类
根据数据库的表,创建Java bean对应的实体类。
package com.knockatdatabase;
/**
* @Author:asher
* @Date:2021/9/28 12:21
* @Description:com.knockatdatabase
* @Version:1.0
*/
public class Employee {
private Integer id;
private String lastName;
private String gender;
private String mail;
//getter、setter、toString略
}顺便添加getter和setter方法,由IDEA自动帮我们生成,同时重写toString()。
二配置mybatis
1 添加mybatis-config.xml文件
在项目工程下,main路径下,右键New –>选择Directory,选择resources,然后再resources下新建名为mybatis-config.xml文件,该文件内容如下:
<?xml version="1.0" encoding="UTF-8" ?>
<!DOCTYPE configuration
  PUBLIC "-//mybatis.org//DTD Config 3.0//EN"
  "http://mybatis.org/dtd/mybatis-3-config.dtd">
<configuration>
  <environments default="development">
    <environment id="development">
      <transactionManager type="JDBC"/>
      <dataSource type="POOLED">
        <property name="driver" value="${driver}"/>
        <property name="url" value="${url}"/>
        <property name="username" value="${username}"/>
        <property name="password" value="${password}"/>
      </dataSource>
    </environment>
  </environments>
  <mappers>
    <mapper resource="org/mybatis/example/BlogMapper.xml"/>
  </mappers>
</configuration>
其中,该文件可以从mybatis官方文档PDF里获取,PDF文件可以随着mybatis的下载包里解压获取。
然后,根据实际情况,将该文件修改为对应的数据库连接信息。如,修改后的内容为:
<?xml version="1.0" encoding="UTF-8" ?>
        <!DOCTYPE configuration
                PUBLIC "-//mybatis.org//DTD Config 3.0//EN"
                "http://mybatis.org/dtd/mybatis-3-config.dtd">
<configuration>
<environments default="development">
    <environment id="development">
        <transactionManager type="JDBC"/>
        <dataSource type="POOLED">
            <property name="driver" value="com.mysql.jdbc.Driver"/>
            <property name="url" value="jdbc:mysql://172.16.11.35:3306/mybatis_project"/>
            <property name="username" value="mybatis_project"/>
            <property name="password" value="mybatis_project"/>
        </dataSource>
    </environment>
</environments>
<mappers>
    <mapper resource="org/mybatis/example/BlogMapper.xml"/>
</mappers>
</configuration>
2同样是在resources下添加SQL mapper文件
这里的mapper文件暂时命名为Employee.xml,其内容为:
<?xml version="1.0" encoding="UTF-8" ?>
<!DOCTYPE mapper
  PUBLIC "-//mybatis.org//DTD Mapper 3.0//EN"
  "http://mybatis.org/dtd/mybatis-3-mapper.dtd">
<mapper namespace="org.mybatis.example.BlogMapper">
  <select id="selectBlog" resultType="Blog">
    select * from Blog where id = #{id}
  </select>
</mapper>
当然,该文件依然是从mybatis官方文档里获取的模板文件。这里根据实际情况修改为:
<?xml version="1.0" encoding="UTF-8" ?>
<!DOCTYPE mapper
        PUBLIC "-//mybatis.org//DTD Mapper 3.0//EN"
        "http://mybatis.org/dtd/mybatis-3-mapper.dtd">
<mapper namespace="com.knockatdatabase.Employee">
    <select id="selectEmployee" resultType="com.knockatdatabase.Employee">
    select * from tbl_employee where id = #{id}
  </select>
</mapper>
将其中的namespace做对应修改,该命名空间的作用是用于定位SQL文件的;
然后修改其中的id为selectEmployee,这样,将来就可以通过namespace+id这两个值唯一的定位到这个唯一SQL语句;
resultType:根据实际情况,改为com.knockatdatabase.Employee,即,这个SQL语句的返回结果类型是com.knockatdatabase.Employee类的对象;
同时要注意,该SQLmapper配置文件写好之后,要将mybatis-config.xml中的mapper文件指向该文件,而不是之前的官方文档的默认配置,修改后的内容为:
<mappers>
    <mapper resource="Employee.xml"/>
</mappers>
3创建测试类EmployeeTest
新建,com/knockatdatabase/EmployeeTest.java其中的内容,依然是根据mybatis官方PDF文件修改的,修改后的内容为:
package com.knockatdatabase;
import org.apache.ibatis.io.Resources;
import org.apache.ibatis.session.SqlSession;
import org.apache.ibatis.session.SqlSessionFactory;
import org.apache.ibatis.session.SqlSessionFactoryBuilder;
import org.junit.Test;
import java.io.IOException;
import java.io.InputStream;
/**
* @Author:asher
* @Date:2021/9/28 19:45
* @Description:com.knockatdatabase
* @Version:1.0
*/
public class EmployeeTest {
@Test
public void test() throws IOException {
//1读取配置文件
String resource = "mybatis-config.xml";
InputStream inputStream = Resources.getResourceAsStream(resource);
//2根据配置文件,创建1个SqlSessionFactory类的对象
SqlSessionFactory sqlSessionFactory =
new SqlSessionFactoryBuilder().build(inputStream);
//3根据SqlSessionFactory的对象,新建一个SqlSession类的对象
SqlSession sqlSession = sqlSessionFactory.openSession();
//4调用SqlSession的方法selectOne(),返回Employee类的对象
Employee e = sqlSession.selectOne("selectEmployee", 1);
System.out.println(e);
}
}
//执行结果:
Employee{id=1, lastName='null', gender='1', mail='null'}从上述的执行结果看到,只有id和gender返回了正确的值,其它2个字段都是NULL。怎么办?
4修改SQL mapper文件
原因就是因为SQL语句中的返回字段名,和Java bean中定义的字段名不一致。我们把SQL语句中的字段取个别名,使其跟Java bean中的字段保持一致即可解决问题:
<?xml version="1.0" encoding="UTF-8" ?>
<!DOCTYPE mapper
        PUBLIC "-//mybatis.org//DTD Mapper 3.0//EN"
        "http://mybatis.org/dtd/mybatis-3-mapper.dtd">
<mapper namespace="com.knockatdatabase.Employee">
    <select id="selectEmployee" resultType="com.knockatdatabase.Employee">
    select id,last_name as lastname,gender,email as mail from tbl_employee where id = #{id}
  </select>
</mapper>
最后,重新执行结果为:
Employee{id=1, lastName='Huang', gender='1', mail='3dian14@gmail.com'}三 小结
1阅读官方文档十分必要,这里根据官方文档就可以快速搭建一个机遇mybatis的快速上手环境,并且可以顺利执行;
2Java基础知识也很重要,之前跟着其他教程做,遇到诸如EmployeeTest.java文件中的:
//1读取配置文件
        String resource = "mybatis-config.xml";
        InputStream inputStream = Resources.getResourceAsStream(resource);
        //2根据配置文件,创建1个SqlSessionFactory类的对象
        SqlSessionFactory sqlSessionFactory =
                new SqlSessionFactoryBuilder().build(inputStream);
        //3根据SqlSessionFactory的对象,新建一个SqlSession类的对象
        SqlSession sqlSession = sqlSessionFactory.openSession();
就懵了,傻了,等把Java基础知识过一遍之后,再回来看这些,就顺利多了,不再卡壳了。尤其是泛型、接口等知识。
3硬着头皮在项目组写了一点儿前后端程序,现在回过头来弥补一下mybatis的基础和原来,就舒服多了;
4不是不会,不是太难,实在是练习的太少了,看的少,懂的自然就少,起步就自然慢了。加油吧。
一条评论
Pingback: